For a probe construction we needed a couple of things like :
Brass rod 150 mm long. Red LED.
Green LED. Black/Red wire 2 meters.
2 resistors 1KΩ Red/Black Alligator clips.
100mm plastic tube 7mm. Shrink tubes.
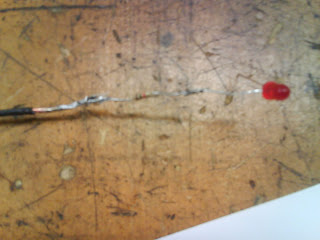
Her i have soldered a 1KΩ resistor to a red LED, and a black wire, the soldring cant be to bulky or rough as it will rip the shrink tube that we use to cover it all up with.
Here i'm soldering the second resistor to a green LED.
now we just slide the shrink tube over the resistor and the soldring, and by using a heat gun we can apply enough heat for the shrink tube to shrink and wrap tightly around the wire.We do this again for the green LED.
this just a photo of how i tied up the resistor with the wire and was ready to solder.
as you can see the soldering had to be very neat.
And this is what it looked like after we soldered the green LED and red LED on and put some shrink tube around the wire by using the heat gun again we just applied heat to the tube and it shrinked,
this just the red LED ready now we were ready to put the plastic tube the LEDs but after we connected them to the brass rod, with a little soldering.
and we placed some shrink tubing ove the brass rod as we so it doesnt short with and wire, after this slided the plastic tube over the LEDs and with the sharp end of the brass rod out, we used hot glue to keep the LEDs stuck to the plastic tube. after that you just twist the wires up nice and neat, and jus place some heat shrink tube over the probe and apply heat to make everthing nice and tight so nothing goes lose and we'r done.You just add alligator clips to the end off the red and black wire with a little solder so the wire stays in place with the clip and you have finshed making a probe,
The probe tester we made is only for 24volts or less. but DC volts only, you just connect the postive aligater clip to the positive side of whatever your testing for example a battery and the black to negative. both the LED lights should glow green and red, and when to touch the brass front end of the tester to positive the green LED will go out and red LED will get brighter because now thier is postive on both end of the green LED, and since the voltage isnt been slip between red and green LED the red LED has got brighter.but when you connect the probe to negative, the same thing will happen but wit the green LED getting brighter and red LED will go out,
Subscribe to:
Post Comments (Atom)


No comments:
Post a Comment